
Best Photos for OTA Listings: What to Shoot and What Goes First
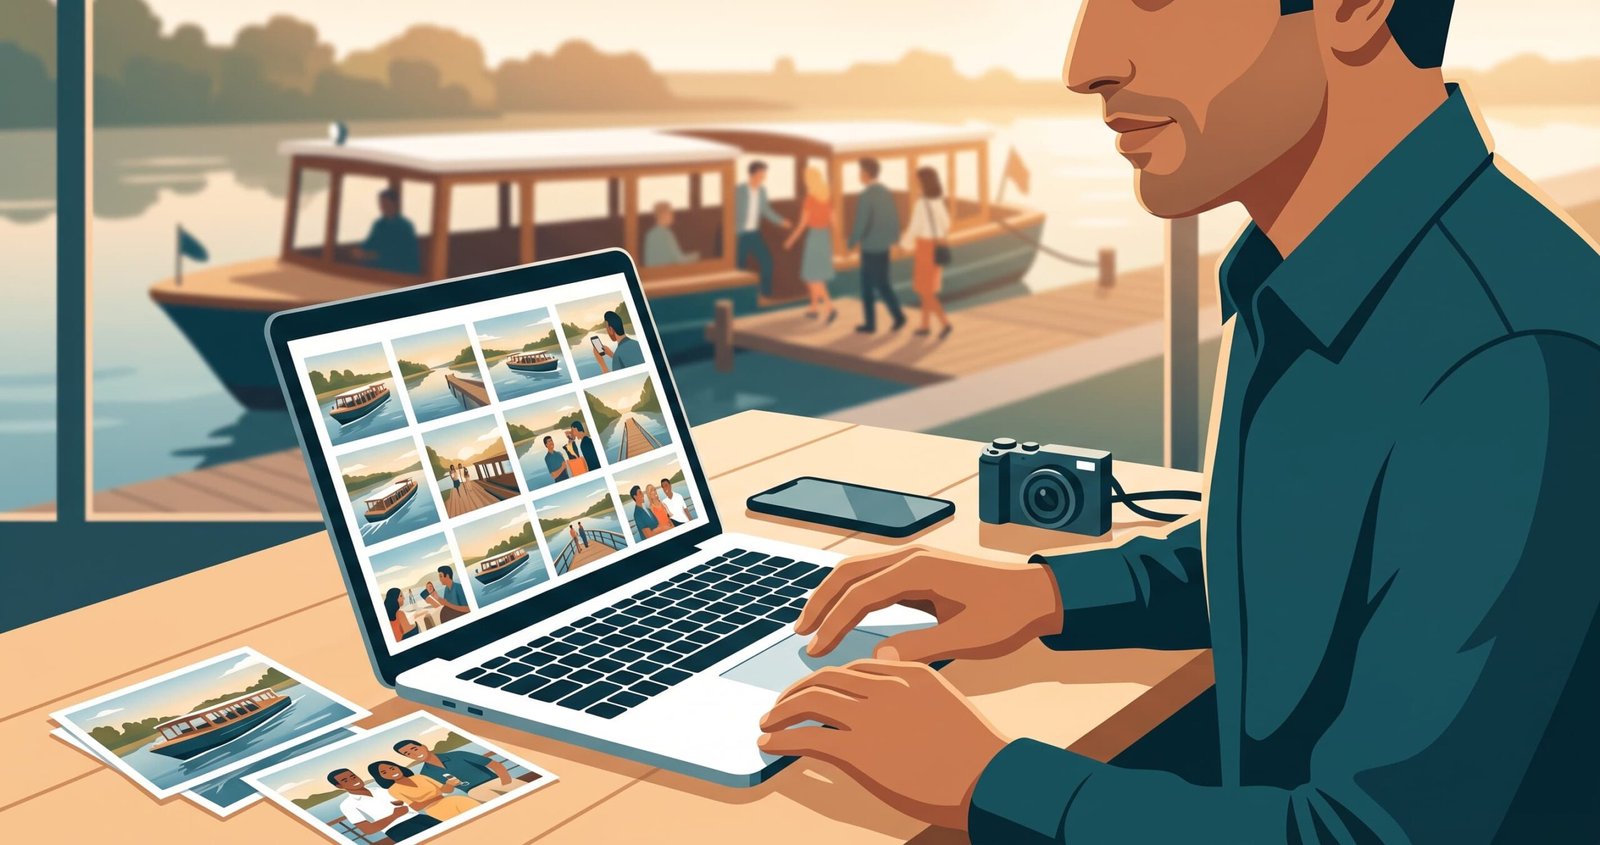
For a tour or attraction, the best photos for OTA listings show real guests in the middle of the experience, shot wide enough that a stranger can tell what the experience is from a thumbnail. Lead with that shot, use the next three to tell the story, and fill the rest of the gallery with the practical details travellers want to check before they pay.
Search for advice on this and almost everything you find is about hotel rooms: corner angles, window light, making the bed look bigger. A tour or an attraction has a different problem. You’re selling a moment, not a room, and the moment usually has people in it, moves, and happens at a particular time of day.
The platforms don’t make it simpler. GetYourGuide, Viator and Airbnb all publish photo guidance, and on some points they disagree with each other. This guide covers what to shoot, how to order the gallery, the specs and rules for each platform as of October 2026, and a shot list you can take on the day. If you’re not sure yet whether your listing’s problem is the click or the booking, start with our guide to optimising your OTA listing, then come back here.
Key Takeaways
- Your first photo has to work at thumbnail size: a wide shot of the experience happening, with no close-ups, crowds, posed people or messy food (GetYourGuide’s rules for the first image)
- GetYourGuide shows your first four photos as a collage on desktop, so treat them as one story: the whole experience, the highlight, the people, the place
- Specs differ by platform: GetYourGuide wants landscape at 1280×960 or larger (2048×1536 ideal), Airbnb’s minimum is 800×1200, and Viator needs 6+ quality photos for its Excellent level
- The platforms’ own numbers are modest but real: GetYourGuide measured a 2.7% booking uplift from better images alone
- Every photo is a promise: shoot at the time of day the experience runs, show what’s really included, and hold model releases for anyone identifiable
The Best Photos for OTA Listings in Seven Rules
- Lead with a wide shot of the experience happening, not a close-up or a view on its own.
- Show real guests doing the activity, not posing and not looking at the camera.
- Use the first four photos to tell the whole story, with no two from the same spot.
- Upload at least six to 10 unique landscape photos, and more if you have them.
- Keep colours true, and skip filters, text, logos, borders and collages.
- Shoot at the time of day the experience runs, in the season it runs.
- Own every photo, and hold model releases for anyone who can be identified.
What Makes the Best Photos for OTA Listings
Your gallery does three jobs, and each one falls to different photos.
The first photo wins the click. It’s the image on the search card, next to your title, price and rating, and on GetYourGuide it’s also the one used “across the platform and in search results”. The first four tell the story once someone clicks. The rest of the gallery answers the practical questions that stop people booking: what the boat looks like, where you meet, what the food actually is.
There’s a fourth job that operators forget. Every photo is a promise. A traveller who sees a sunset, an empty gallery or a live guide expects to get one. GetYourGuide’s own guidance warns that if visitors “encounter a surprise during the tour that they didn’t see in your photos, they might leave feeling unsatisfied.” Unsatisfied guests write the reviews that drag your ranking down, which is why photos belong in the same conversation as managing your reviews.
How much do photos move bookings? The platforms’ own figures are smaller than the claims you’ll see on vendor blogs. GetYourGuide says a test showed a 2.7% uplift in booking conversions from improved images alone (GetYourGuide Supply Partner Help Center, updated December 2025). Viator said in 2020 that products with 10 photos had nearly 160% more bookings than those with only one.
That second number compares a decent gallery with almost no gallery at all, so it tells you more about the cost of having one photo than about the value of a perfect one. The honest reading: photos won’t rescue a weak experience, but a thin or misleading gallery will hold back a good one.
Choosing Your Lead Photo: Built for a Thumbnail
The first photo is shown small, usually on a phone, next to a dozen competitors. GetYourGuide tells suppliers to “keep in mind the size of the activity cards” and to use wider shots “with plenty of information about the tour itself.” The basic test: could someone tell what the experience is from this image alone?
GetYourGuide’s list of what not to use as a first photo is specific, and worth following on every platform:
- Close-ups or “sensory” shots (the glass, the plate, the hands)
- Staged or posed people
- Anything that looks like a stock photo
- Crowds
- Messy food
Two things catch out even careful operators. First, your photo will be cropped. GetYourGuide warns against putting the main subject in the top or bottom third of the frame, because “your images get used in different sizes on our platform.” Google’s Things to Do feed, which many booking systems send your photos to, prefers square images and crops to fit. Keep the subject in the middle of the frame with space around it, and nothing important near the edges.
Second, the best first photo can differ by platform. Airbnb asks hosts for portraits of themselves. GetYourGuide and Viator don’t want posed people up front. You can upload the same files everywhere and still choose a different lead image for each.
The First Four: One Story, Not Four Good Photos
On desktop, GetYourGuide shows your first four photos together as a collage. A traveller sees them as one picture before they see any of them on its own. Four strong photos that all show the same view tell a weak story.
A simple order that works for most tours and attractions:
- The whole experience: the widest shot of guests doing the thing.
- The highlight: the moment people mention in reviews.
- The people: guests and your guide or staff, candid, mid-conversation.
- The detail that’s yours: the place, the view or the object no competitor has.
GetYourGuide asks for a balance of “informative and aspirational” images in the first four, and for photos that “complement each other both in subject and color.” In practice, that means no two from the same spot, and not four images with the same blue sky.
Viator’s advice points the same way. Its operator guidance says “the most successful product listings show happy travelers enjoying the activities included in the experience,” with landmark and scenery shots as the alternative when the place itself is the product.
The Rest of the Gallery: Answer Questions Before They’re Asked
After the first four, GetYourGuide recommends telling the story in order, from start to finish, and using the gallery for practical information: “what kind of vehicles are used, what kind of food you offer.” This is where you lower the anxiety that stops a booking.
Useful photos that rarely make it into galleries:
- The meeting point, with the sign or landmark visible
- The vehicle or boat, inside and out
- The entrance to an attraction, so people recognise it on arrival
- The food as it’s served (not after it’s been eaten)
- Facilities on longer experiences: toilets, shelter, seating, step-free access
How many photos? GetYourGuide’s minimum is four, and it says “the more the merrier.” Viator requires six or more quality photos for a product to reach its Excellent level and has recommended six to nine. Airbnb asks for at least five and suggests 15 to 20. A practical target is 10 to 15 unique photos, which clears every platform’s bar without padding the gallery with near-duplicates. GetYourGuide deletes duplicates anyway.
Close-ups have a place, but a small one. GetYourGuide’s advice is to use them for “specific parts of your experience,” such as a special dish or a gift, and to keep “most of your activity photos” in a wider context.
OTA Photos Best Practices for Attractions and Ticketed Venues
Almost every photo guide assumes a guided tour with a charismatic guide. Museums, castles, aquariums and other ticketed attractions have different problems.
Empty rooms look closed. Viator’s list of photos to avoid includes “pictures of empty spaces where you’d expect people to be.” Attractions shoot at opening time because it’s easy, and the result looks like a venue nobody visits.
There’s no guide to feature. Show visitors with the exhibits instead: a child at a touch pool, a couple reading a panel, a family on the battlements. The visitor’s reaction does the job a guide does on a tour.
Crowds are a trap in both directions. GetYourGuide says no crowds in the first photo. But a gallery of a calm, empty hall sets up a disappointment if your Saturday afternoons are packed. Show the venue busy but comfortable.
Shoot it when it runs. GetYourGuide’s rule for tours applies here too: “If your tour happens during sunrise, show photos during sunrise.” A night-time illumination, a seasonal event or an evening opening needs photos taken at that time.
I worked with a small castle attraction that had used the same first photo for years: the great hall, perfectly lit, completely empty, taken before opening on a winter morning.
It looked beautiful at full size and dead as a thumbnail. We reshot on a busy half-term afternoon, with a family in the foreground looking up at the hammerbeam roof and a guide talking to a group behind them. Nothing else on the listing changed.
The click-through rate on GetYourGuide improved the following month, and the reviews stopped mentioning that the castle was “busier than expected.”
Tour Photography Tips: How to Run a Photo Shoot for Your Listing
You don’t need a professional photographer to meet any platform’s standard. GetYourGuide has a whole help article on shooting with a phone. You do need a plan.
Before the shoot
- Pick your real time slot. GetYourGuide’s preparation checklist starts with checking your activity’s time slots, so you shoot when the experience actually runs.
- Check the weather and choose a day that shows the experience at its best, without misrepresenting it.
- Tell your staff, and get their consent to be photographed.
- Bring model releases. GetYourGuide requires them for anyone identifiable, and especially for children. It provides a template.
People in the photos
Real guests who agree to be photographed are best. Friends who actually do the activity are the next best thing. GetYourGuide is happy for you to use “models”, as long as they take part for real and you “don’t pose” them to fake a reaction.
Viator’s guidance adds a detail worth following: avoid “shots of customers or staff looking directly at the camera,” and avoid action shots where people look “frightened or overexcited.” Candid beats posed on every platform except one: Airbnb asks hosts for four or five portraits looking into the lens. Take those separately.
Show staff doing only what they really do. GetYourGuide’s example is a boat tour with a pre-recorded commentary: don’t photograph a live guide, because guests will expect one.
On the day
- Turn the grid on and the flash off.
- Check your phone saves at full resolution (GetYourGuide’s minimum is 1280×960).
- Shoot landscape, with both hands, using autofocus.
- Take far more photos than you need, mostly wide, from several different spots.
- If you sell on Airbnb, take a few vertical versions of your best shots.
Editing
Light edits are fine. GetYourGuide suggests auto-enhance, lifting shadows (not to full strength) and pulling down highlights, then straightening with the grid. Don’t use HDR, heavy filters, text, logos, borders or collages. Airbnb also rules out AI-enhanced photos, and GetYourGuide won’t accept images where you’ve removed parts of the scene.
When is a professional worth paying for? In my view, for your best-selling product, or for a product with good reviews and a poor conversion rate. That’s the listing where the photos are most likely to be what’s holding it back, and where a small improvement is worth the most money.
A former colleague ran evening river cruises, and every photo on the listing had been taken at midday in June: bright water, blue sky, people in sunglasses. The cruise left at 7.30pm, and for half the season it ran in the dark.
Reviews kept saying, politely, that it “wasn’t what the photos showed.” He reshot on three evenings in September, at golden hour and after dark with the bridges lit. The complaints about the photos stopped, and the after-dark shot became his first photo on Viator.
Shot List for Your OTA Listing Photos
Take this on the day. Tick each shot off, then pick the best two or three of each.
| Shot | What it shows | Where it goes | Platform notes |
|---|---|---|---|
| Wide establishing shot | Guests doing the activity in its setting | First photo | Subject centred for cropping |
| The highlight moment | The thing reviews mention most | Photo 2 | Candid, no eye contact with camera |
| Guests reacting | Real emotion, mid-experience | Photo 3 | Model releases needed |
| Guide or staff in action | Who guests will meet | Photo 3 or 4 | Only if a live guide is included |
| The place or view | What makes the location yours | Photo 4 | Shoot at the time it runs |
| Signature detail | A dish, object or gift, close up | Gallery | Use sparingly |
| Food as served | What’s included, looking appetising | Gallery | Never the aftermath |
| Vehicle, boat or entrance | What guests will recognise on arrival | Gallery | Inside and out for vehicles |
| Meeting point | The sign or landmark | Last photos | Helps reduce no-shows |
| Facilities | Toilets, seating, step-free access | Last photos | Useful for longer experiences |
| Host portrait | The host, looking at the camera | Airbnb only | Four or five, plain backgrounds |
| Vertical hero shot | Your best shot in portrait | Airbnb only | Airbnb minimum 800×1200 |
GetYourGuide, Viator and Airbnb Photo Requirements Compared
The table below sets out GetYourGuide photo requirements, Viator photo requirements and Airbnb’s rules as published in October 2026. Check your supplier portal before a shoot, because specs change.
| GetYourGuide | Viator | Airbnb Experiences | |
|---|---|---|---|
| Orientation | Landscape only | Check the Management Center | 800×1200 minimum suggests portrait |
| Minimum size | 1280×960 | Check the Management Center | 800×1200 |
| Ideal size | 2048×1536 (4:3) | Not published | Not published |
| Minimum number | 4 | Set in the Management Center | 5 |
| Recommended number | “The more the merrier” | 6 to 9; 6+ for Excellent | 15 to 20 |
| First photo | Wide, informative; no close-ups, posed people, crowds or stock-looking images | A strong feature image | Not specified |
| People looking at camera | Avoid posed people | Avoid | Yes, for host portraits |
| Banned or discouraged | Watermarks, logos, number plates, collages, HDR, heavy filters, B&W, doctored images | Stock, blurry or unrelated photos | Stock, AI-enhanced, screenshots, collages, text, B&W, duplicates |
Sources: GetYourGuide’s photo upload guidance (updated December 2025), Viator’s photography guidance (2020), and Airbnb’s experience photo guide.
If your booking system feeds Google Things to Do, your photos also appear there. Google prefers square images, recommends at least 1024×683, and doesn’t guarantee that your chosen first image will be the one it shows. One more reason to keep the subject centred.
For more on each platform’s quality levels and listing setup, see our Viator supplier guide, GetYourGuide operator guide and Airbnb Experiences operator guide.
Rules That Get Photos Rejected (or Get You in Trouble)
Most of these come from GetYourGuide’s guidance, but they’re sound on every platform.
- Photos you don’t own. You must own the photos or have permission. “Don’t use images from Google or third-party sites without licenses.”
- Licensed locations. GetYourGuide warns that “certain major attractions require licenses for use of imagery of their locations,” and names Disney. If your tour visits a third-party attraction, check before you use its interior.
- Identifiable people without releases, especially children. On Airbnb, any child on the cover photo must be with an adult.
- Watermarks, logos and readable number plates. Blur plates, and keep your logo off the photos.
- Stock photos. All three platforms say no. Viator says they hurt your chances of a booking and keep you from Excellent.
- Screenshots, printed maps, collages and black-and-white images.
- Things that aren’t part of the product. A live guide on an audio tour, a sunset on a morning tour, or a meal that’s actually an optional extra.
Check Your Photos Against Your Listing
Photos and text get written at different times, often by different people, and they drift apart. Once a year, open your listing and check each photo against the product description, the inclusions and your settings:
- Does every included item appear, and does nothing appear that isn’t included?
- Do the photos match the time of day and the season you sell?
- Does the group size in the photos match the group size you run?
- Does the first photo still match your title?
When you change photos, change one thing at a time and give it a few weeks. If you swap the first photo and rewrite the title on the same day, you won’t know which one moved the numbers. Our guide to measuring OTA performance covers which metrics to watch.
Start With Your First Photo
The best photos for OTA listings aren’t the most beautiful ones. They’re the ones that tell a stranger, at thumbnail size, what they’ll do, who they’ll do it with and what it will feel like. The rest of the gallery then gives them everything they need to book without worrying.
One thing to do today: open your busiest listing on your phone, search for your own experience and look at your card next to the competition. If you can’t tell what your experience is from the first photo alone, that’s your first reshoot. Put it on the shot list, pick a day when the experience is running, and go and take it.
OTA Listing Photos FAQ
How many photos should an OTA listing have?
At least six, and ideally 10 to 15 unique photos. GetYourGuide’s minimum is four, Airbnb’s is five, and Viator requires six or more quality photos for its Excellent level. Beyond that, add photos only if each one shows something new.
What are GetYourGuide’s photo requirements?
Landscape, at least 1280×960 pixels, ideally 2048×1536 at a 4:3 ratio, in JPG or PNG format and in colour. Keep the main subject out of the top and bottom thirds, because GetYourGuide crops images to different sizes.
What are Viator’s photo requirements?
Viator sets its current minimum and technical specs in the Management Center, so check there before you upload. For its Excellent quality level, you need six or more quality photos, and Viator has recommended six to nine. Stock, blurry or unrelated photos count against you.
Can I use stock photos on GetYourGuide or Viator?
No. Both platforms discourage stock images, and Viator says they keep a product from reaching its Excellent level. Airbnb bans them outright. Use your own photos of the real experience.
Should people in my OTA photos look at the camera?
Generally not. Viator advises against guests or staff looking directly at the camera, and GetYourGuide wants candid, unposed shots. Airbnb Experiences is the exception: it asks for host portraits looking into the lens.
Do I need a professional photographer for my OTA listing?
No. A recent phone, natural light and a planned shoot during a real session will meet every platform’s standard. A professional is worth considering for your best-selling product, or for a listing with good reviews but a low conversion rate.






3 Comments